Creating marketing campaigns shouldn’t feel like navigating five different tools at once. Yet many platforms still require users to jump between dashboards, making the process confusing, especially for non-technical users.
In this project, I explore how clear documentation and UX writing can simplify campaign creation through a single, guided workflow.
I create a fictional SaaS product, FlowDesk, and design the documentation and in-product content for its Campaign Builder feature.
The Problem
Campaign creation is often fragmented. Users switch between tools, struggle to understand next steps, and lack visibility into results.
For small teams and beginners, this creates friction and slows down execution.
The Approach
I focus on three key areas:
- Clear feature documentation to explain what the tool does
- Step-by-step guidance to support task completion
- UX writing to reduce confusion within the interface
The goal is to create a cohesive experience from learning the tool to using it.
Feature Overview
Campaign Builder
Campaign Builder lets you create, schedule, and manage marketing campaigns across multiple channels from a single dashboard. It uses a guided workflow to help you move from planning to launch without switching between tools.
Who it’s for
Campaign Builder is designed for:
- Small business owners
- Marketing beginners
- Non-technical users
- Teams that need a streamlined workflow
What you can do
With Campaign Builder, you can:
- Create or duplicate campaigns
- Select one or more channels
- Add channel-specific content
- Schedule or launch campaigns
- Save drafts and edit before publishing
- Monitor performance after launch
Key features
Multi-channel publishing
Publish campaigns across social media, email, and SMS from one workflow, with tailored content for each channel.
Scheduling and drafts
Prepare campaigns in advance, save drafts, and schedule content for later.
Performance tracking
View key metrics after launch and refine future campaigns based on results.
Basic reporting
Generate simple reports with summary cards, engagement charts, and export options.
How it works
- Open Campaign Builder from the dashboard
- Create a new campaign or duplicate an existing one
- Enter a name and goal
- Select your audience and channels
- Add content for each channel
- Review your campaign
- Save, schedule, or launch
Campaigns are labeled as Draft, Scheduled, or Live, and performance can be viewed from the Campaigns page.
Channels and metrics
Campaign Builder supports social platforms like Facebook, Instagram, LinkedIn, and X, along with email and SMS campaigns.
You can manage contacts by uploading CSV files, adding them manually, or syncing from supported CRM tools. Contacts can be organized into lists or segments for targeting.
After launch, you can track:
- Open rates
- Click rates
- Engagement
- Delivery status
You can also connect tools like Google Analytics for additional insights.
Creating a Campaign
Create your first campaign in FlowDesk using Campaign Builder. This guide walks you through setting up, launching, and monitoring a campaign across multiple channels.
Before you begin
- Sign in to your FlowDesk account
- To use email or SMS, add contacts by uploading a CSV file, adding them manually, or importing from a CRM
- Connect your social media channels
Add contact
Go to Settings > Contacts.
To import from CSV:
- Format your file with fields like Name, Email, and Phone
- Save using UTF-8 encoding
- Select Import CSV and upload your file
- Fix any validation errors
- Assign contacts to a list or segment
To add manually:
- Select Add Contact
- Enter required fields
- Assign to a list or segment
- Select Save
To import from a CRM:
- Select Import Contacts
- Choose a supported CRM
- Sign in and select contacts
- Assign them to a list or segment
Connect channels
Go to Settings > Channels:
- Select a channel
- Sign in and allow permissions
- Enable analytics if needed
Create a campaign
- Open Campaign Builder
- Select Create Campaign
- (Optional) Duplicate an existing campaign
- (Optional) Use a Smart Campaign
Set campaign details
- Enter a campaign name
- Select a goal (e.g., traffic, inquiries, conversions)
Select your audience
- Choose one or more contact lists or segments
- (Optional) Adjust targeting
Choose channels
- Select the channels you want to use
- Enable SMS or Email if needed
- Connect any missing channels
Add content
- Add content for each channel
- Customize messaging per platform
- Upload images or media
- Use Same as above to reuse content
- Add short-form copy for SMS
- Use text, images, or HTML for email
Review your campaign
Before launching, confirm:
- No errors or validation issues
- Correct audience and channels selected
- Content is complete and accurate
Save or schedule
- Select Save to keep as draft
- Select Schedule to publish later
- Select Launch to publish immediately
Campaign status updates to:
- Draft
- Scheduled
- Live
View performance
- Go to the Campaigns page
- Select a campaign
- Open the Results tab
Track metrics like engagement, delivery status, and channel performance.
UX Writing in Context
Empty State
The empty state introduces the feature and directs users toward their first action. Instead of overwhelming the user, it focuses on a single clear next step: creating a campaign.
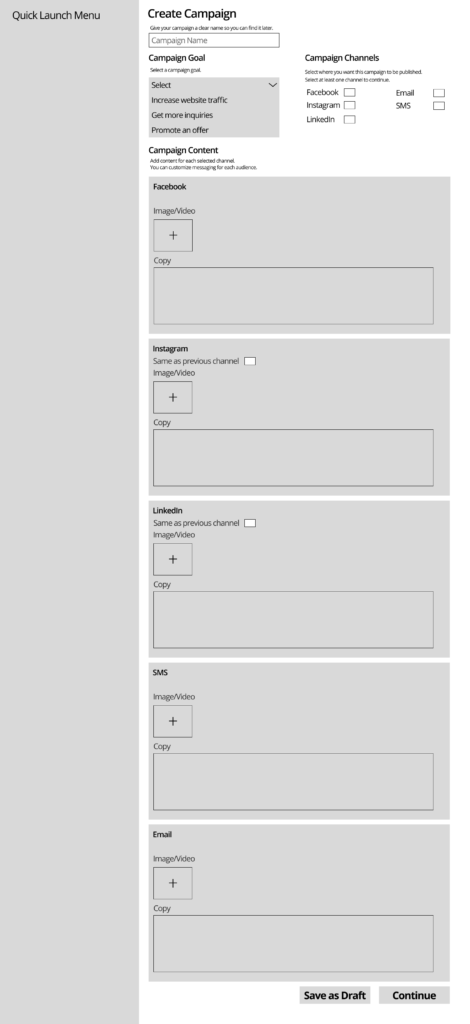
Campaign Creation
The campaign creation screen uses structured inputs and helper text to guide users through each step. Each field is labeled clearly to reduce decision fatigue and eliminate guesswork.
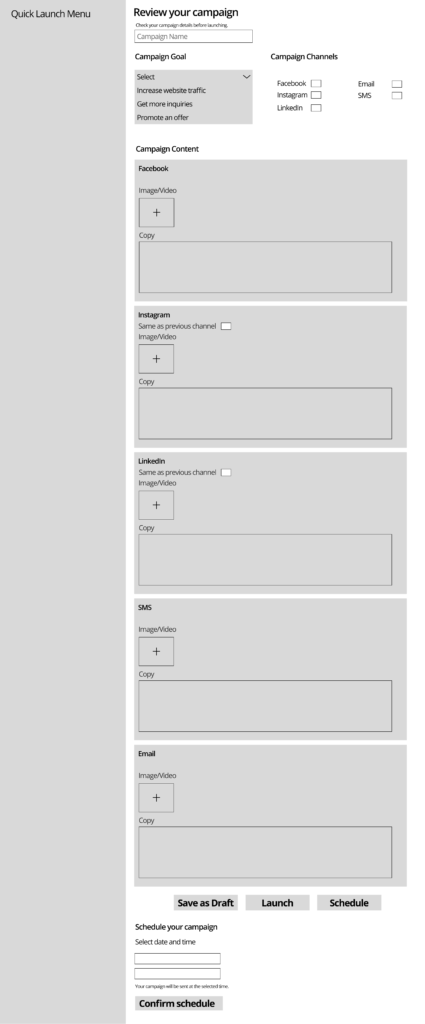
Review and Launch
Before launching, users can review campaign details in one place. This reduces errors and gives users confidence in their actions.
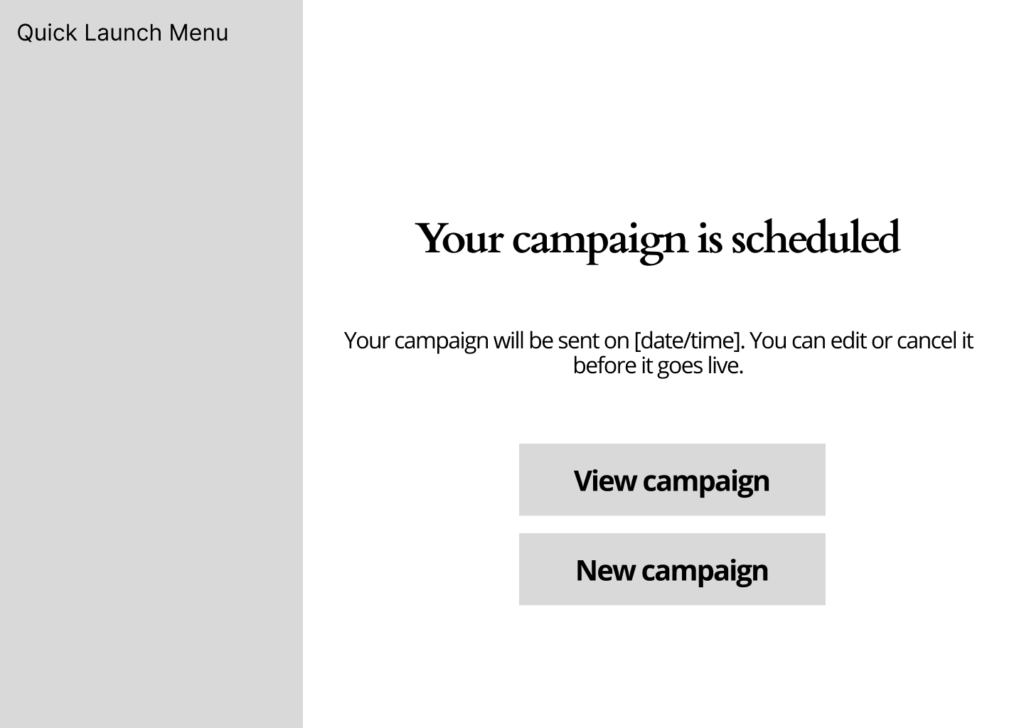
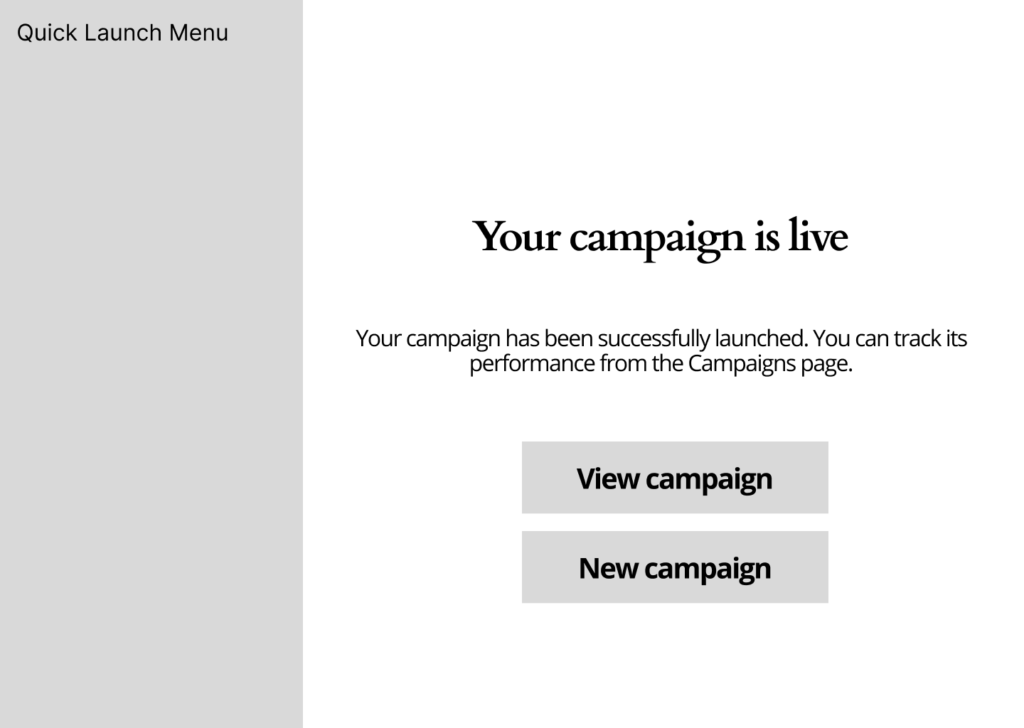
Success State
Clear success states confirm that actions were completed and guide users toward their next step, whether that’s viewing performance or creating another campaign.
PDF Guides
Here I have more comprehensive guide documents.
What I Focus On
This project focuses on clarity, structure, and reducing cognitive load.
- Breaking complex workflows into manageable steps
- Using plain language to guide users
- Supporting actions with contextual help
- Creating consistency across documentation and UI
Together, these elements create a more intuitive product experience.
Interested in working with me? Contact for more details.